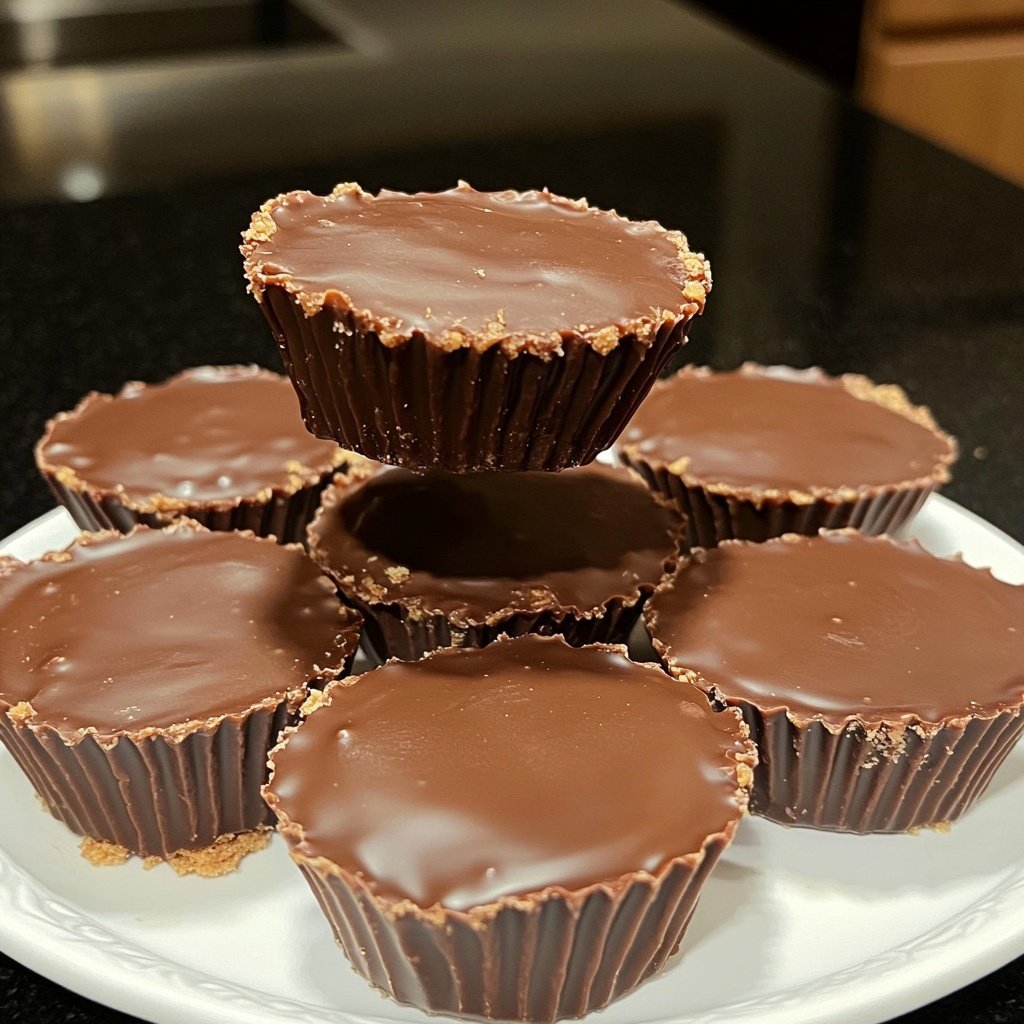
Homemade Peanut Butter Cups with Coconut Oil
Highlighted under: Favorite Baking Ideas
I absolutely love the combination of rich chocolate and creamy peanut butter, and making these Homemade Peanut Butter Cups with Coconut Oil takes that joy to a new level. The coconut oil not only enhances the flavor but also gives these treats a glossy finish. It’s a simple recipe that I whip up whenever I crave something sweet. With just a few ingredients, I can create a delicious indulgence that satisfies my sweet tooth while impressing my friends and family. Trust me, once you try them, you won’t go back to store-bought versions!
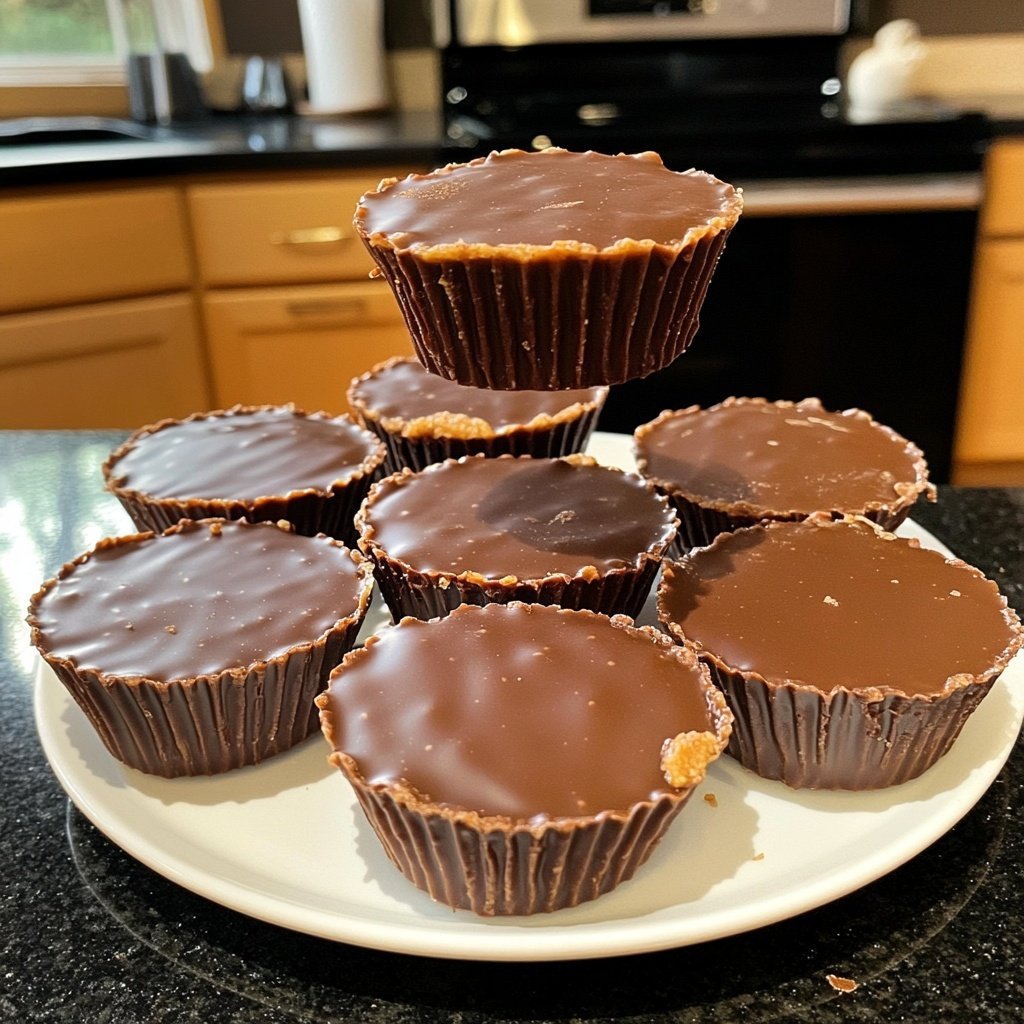
When I first decided to make my own peanut butter cups, I was surprised by how simple and satisfying the process was. Using coconut oil in the chocolate coating makes them melt-in-your-mouth delicious, adding a subtle tropical flavor that pairs perfectly with the nutty peanut butter. A tip I learned is to chill the mixture slightly before adding the top layer, helping to create distinct layers and prevent them from blending.
One tactic I love is to use smooth peanut butter for a creamier texture, but you can easily substitute crunchy if you prefer added crunchiness. Another tip is to let the cups cool completely in the fridge to achieve that perfect snap when you bite into them. The homemade touch is truly what makes these treats special!
Why You'll Love This Recipe
- Rich chocolate flavor complemented by creamy peanut butter
- Using coconut oil enhances the health factor
- Easy to customize with different types of nut butters
Chocolate Choices
The type of chocolate you choose for this recipe can significantly affect the flavor profile of your homemade peanut butter cups. Dark chocolate chips bring a rich depth, balancing the sweetness of the peanut butter filling. I recommend a chocolate with at least 60% cocoa for a perfect contrast, but feel free to experiment with semi-sweet or even bittersweet varieties if you prefer a different taste. Just be mindful of the sweetness level; you may need to adjust the powdered sugar accordingly.
Additionally, consider that using chocolate bars instead of chips can yield a smoother texture. If you opt for bars, chop them into smaller pieces for easier melting. This can help achieve a glossy finish on the cups, ensuring they look as delightful as they taste.
Perfecting the Peanut Butter Filling
When mixing the creamy peanut butter filling, it's essential to achieve a smooth and spreadable consistency. Use a natural peanut butter for the best flavor and texture, but be aware that some natural varieties may be runnier. If this is the case, slightly reduce the powdered sugar to maintain the filling’s thick texture. This balance is crucial; if the mixture is too soft, it won’t hold its shape when layered with chocolate.
A good practice is to taste the filling once mixed and adjust the sweetness, adding more powdered sugar if you prefer a sweeter treat. This step allows you to customize the flavor to your liking, ensuring that each bite is delightful.
Storage and Variations
To store your homemade peanut butter cups, place them in an airtight container in the refrigerator. They can last up to two weeks, but I find they rarely last that long! If you’d like to make them ahead of time, you can also freeze them. Just layer them between parchment paper in a freezer-safe container, and they’ll keep for up to three months. Thaw them in the refrigerator before serving for the best texture.
Feel free to experiment with different nut butters, such as almond or cashew, for a unique twist on the classic flavor. You can also add fillings like crushed pretzels or toffee bits for a crunchy texture, enhancing the overall experience with each bite.
Ingredients
For the Peanut Butter Cups
- 1 cup dark chocolate chips
- 1/4 cup coconut oil
- 1/2 cup creamy peanut butter
- 1/4 cup powdered sugar
- 1/4 teaspoon sea salt
Make sure to choose high-quality ingredients for the best flavor!
Instructions
Melt the Chocolate
In a microwave-safe bowl, combine the dark chocolate chips and coconut oil. Microwave in 30-second intervals, stirring in between, until melted and smooth.
Prepare the Cups
Line a muffin tin with paper liners. Pour a spoonful of the melted chocolate into each liner, enough to cover the bottom. Place the tin in the refrigerator for about 10 minutes to set.
Mix the Peanut Butter Filling
In a separate bowl, mix together the creamy peanut butter, powdered sugar, and sea salt until well combined.
Assemble the Cups
Once the chocolate has set, remove the muffin tin from the refrigerator. Add a spoonful of the peanut butter mixture on top of the set chocolate, spreading evenly.
Top with More Chocolate
Pour another layer of the melted chocolate over the peanut butter filling, ensuring it is fully covered. Return to the refrigerator for 20 minutes to set completely.
Serve and Enjoy
Once set, remove the peanut butter cups from the muffin tin, peel off the liners, and enjoy your delicious homemade treats!
These cups can be stored in the fridge for up to one week!
Pro Tips
- If you want to add a twist, try incorporating some crushed nuts or a sprinkle of sea salt on top before the final chocolate layer sets.
Troubleshooting Chocolate Melting
Melting chocolate can sometimes be tricky, and overheating can lead to a grainy texture. To prevent this, always melt chocolate in short bursts and stir intermittently to promote even heating. If you find your chocolate has seized up, adding a teaspoon of coconut oil can help restore its smooth consistency. Just be sure to do this gradually to avoid overly thinning the chocolate, which could affect how well it sets.
If you're using a double boiler instead of the microwave, make sure the bowl does not touch the simmering water. This helps maintain a low and steady temperature, allowing the chocolate to melt smoothly without burning.
Serving Suggestions
These peanut butter cups can be served alone as a delightful treat, but I love pairing them with a scoop of vanilla ice cream for a decadent dessert experience. They can also be crumbled on top of yogurt or pancakes for a tasty twist at breakfast. If you're entertaining, serve them on a decorative platter with fresh fruit for a more elegant presentation.
For those with dietary restrictions, consider using dairy-free chocolate and natural nut butters to make these treats suitable for vegans. Additionally, swapping out refined sugar with coconut sugar or a sugar-free alternative can cater to different dietary needs without sacrificing taste.
Scaling the Recipe
If you’re looking to make a larger batch for a party or event, this recipe is easily scalable. Simply double or triple the amounts of each ingredient, and adjust the number of muffin tins accordingly. If you don’t have enough muffin tins, you can pour the mixture into a small baking dish lined with parchment paper, then slice it into squares once set, resulting in a more rustic presentation.
When scaling up, be mindful of the melting time for the chocolate; larger quantities may require additional bursts in the microwave, so always check for a smooth consistency before moving on to the next steps. Keeping an eye on texture ensures that your treats will turn out perfectly, even in larger quantities.
Questions About Recipes
→ Can I use milk chocolate instead of dark chocolate?
Yes, you can substitute milk chocolate, but keep in mind it will alter the flavor and sweetness.
→ How do I store leftover cups?
Store them in an airtight container in the refrigerator for up to one week.
→ Can I make these nut-free?
Absolutely! Substitute the peanut butter with sun butter or a similar nut-free alternative.
→ What can I use instead of coconut oil?
You can use unsalted butter or any neutral oil, but it may affect the flavor and texture slightly.
Homemade Peanut Butter Cups with Coconut Oil
Created by: Genevieve Porter
Recipe Type: Favorite Baking Ideas
Skill Level: Easy
Final Quantity: 12 cups
What You'll Need
For the Peanut Butter Cups
- 1 cup dark chocolate chips
- 1/4 cup coconut oil
- 1/2 cup creamy peanut butter
- 1/4 cup powdered sugar
- 1/4 teaspoon sea salt
How-To Steps
In a microwave-safe bowl, combine the dark chocolate chips and coconut oil. Microwave in 30-second intervals, stirring in between, until melted and smooth.
Line a muffin tin with paper liners. Pour a spoonful of the melted chocolate into each liner, enough to cover the bottom. Place the tin in the refrigerator for about 10 minutes to set.
In a separate bowl, mix together the creamy peanut butter, powdered sugar, and sea salt until well combined.
Once the chocolate has set, remove the muffin tin from the refrigerator. Add a spoonful of the peanut butter mixture on top of the set chocolate, spreading evenly.
Pour another layer of the melted chocolate over the peanut butter filling, ensuring it is fully covered. Return to the refrigerator for 20 minutes to set completely.
Once set, remove the peanut butter cups from the muffin tin, peel off the liners, and enjoy your delicious homemade treats!
Extra Tips
- If you want to add a twist, try incorporating some crushed nuts or a sprinkle of sea salt on top before the final chocolate layer sets.
Nutritional Breakdown (Per Serving)
- Calories: 180 kcal
- Total Fat: 13g
- Saturated Fat: 7g
- Cholesterol: 0mg
- Sodium: 75mg
- Total Carbohydrates: 16g
- Dietary Fiber: 1g
- Sugars: 9g
- Protein: 3g